HUD Basics and the Gameplay Message Router
A HUD consists to two main parts, the user widget which draws on the screen and the HUD class which loads and displays that widget.
User Widget
We create a user widget using right-click | User Interface | Widget Blueprint and deriving from User Widget:
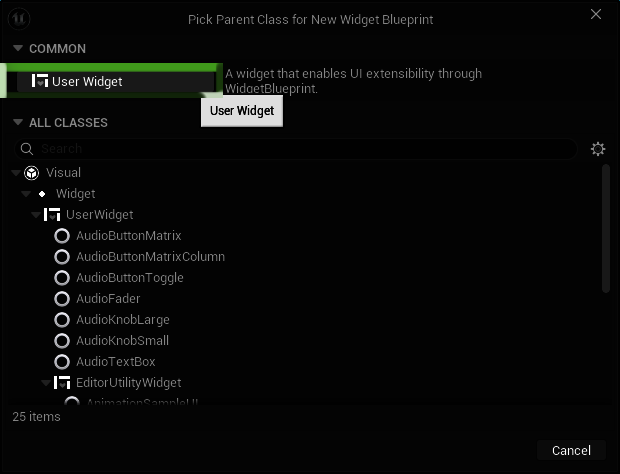
The recommended naming convention for a widget blueprint is WBP_XXX
In this example we want to display the players speed on the HUD.
Open the HUD widget and add:
- a Canvas Panel
- a Text element with the text "Speed"
- a Text element called "SpeedValue" with the text "9999"
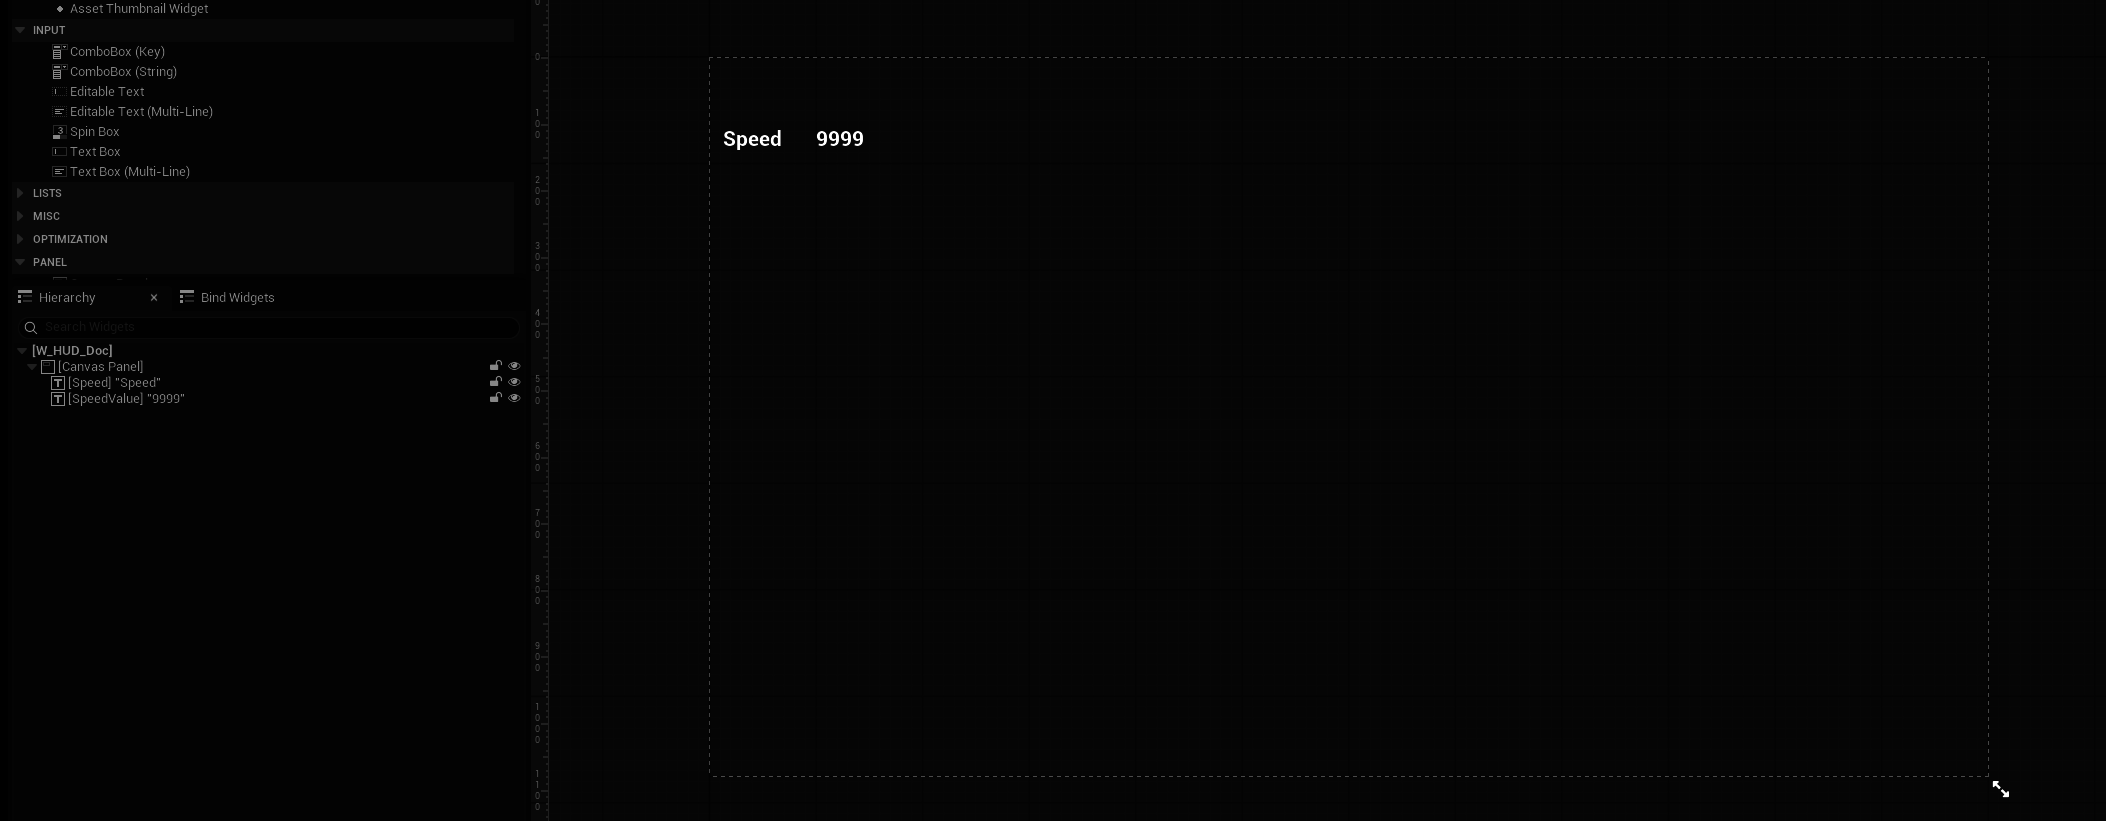
Compile and save this blueprint.
HUD Class
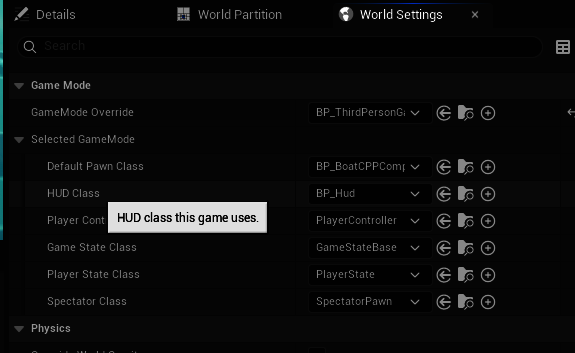
We create a new HUD which is a C++ class or blueprint deriving from AHUD. It is set as the HUD Class property on the game mode:
If we create a blueprint HUD (called BP_Hud) deriving from the HUD class, it needs to create an instance of the associated widget, and then add it to the viewport. To do this add these nodes in the Event Graph on BP_Hud:

Value Struct
We want to send a set of values from the C++ or blueprint parts of the game to the HUD. To do this we will create a structure in C++. For now it holds the single speed value we want do display:
USTRUCT(BlueprintType)
struct FPlayerStats
{
	// broadcast stats for the UI

	GENERATED_BODY()

	UPROPERTY(BlueprintReadOnly)
	float Speed = 0.0f;
};
This structure will be created and fill in by the game code and sent to the UI.
The Gameplay Message Router plugin
The gameplayer message router is a plugin from the Epic Games Lyra example which we will reuse in our project. It sits between message senders and receivers so that senders and receivers are independent of one another. A game object such as a player controller broadcasts a message without knowing or caring what objects, if any, are receiving it. This makes it easier to develop systems which are independent of each other.
To get this plugin copy the code directly from the Epic source code.
Assuming you have the engine source downloaded you copy just the plugin:
robocopy d:\EpicSamples\LyraStarterGame57\Plugins\GameplayMessageRouter [YourGame]\Plugins\GameplayMessageRouter /MIR
If you don't have the source you can find it on github here
To activate the plugin, you need to add it to your project's .build.cs file:
PublicDependencyModuleNames.AddRange(new string[] {
	"Core",
	"CoreUObject",
	...
	"GameplayMessageRuntime"
} );
After this you need to regenerate the .sln file.
Broadcasting Values
In game code you can create an instance of the FPlayerStats structure, set its values, and broadcast it. Ideally the structure is broadcast when the values it contains changes, not just on every tick.
#include "GameFramework/GameplayMessageSubsystem.h"

...


FPlayerStats Stats;
Stats.Speed = 110.0f;

UGameplayMessageSubsystem& MessageSystem = UGameplayMessageSubsystem::Get(this);
MessageSystem.BroadcastMessage(GameplayTags::Player_Stats_Updated, Stats);
This will send a message to anything that is listening for the combination of the specified gameplay tag and the FPlayerStats structure.
The gameplayer message router plugin uses gameplay tags so you have to have the "GameplayTags" module added as a dependency in your project.build.cs file.
Receiving Values
Receiving a message has two parts:
- receive the message when it is broadcast and store it
- display it when the UI is refreshed
Receiving
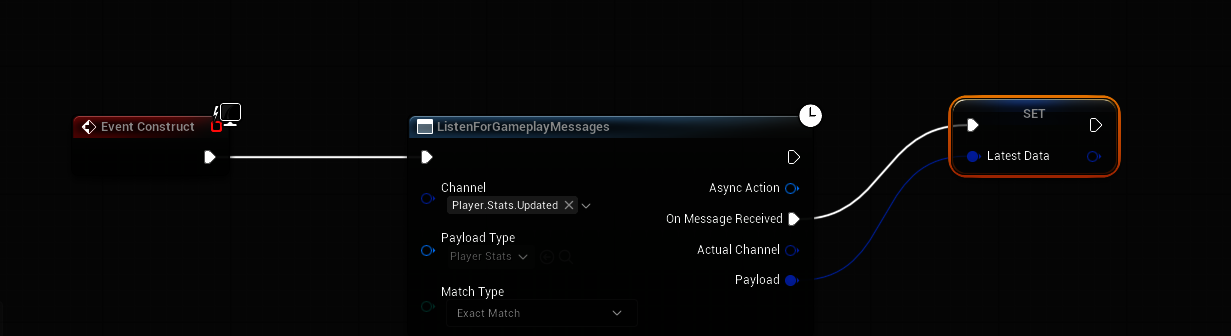
To receive the message, in the Event Graph of the widget add a ListenForGameplayMessages node and set the Channel property to the gameplay tag which was used when the message was broadcast, i.e. Player_Stats_Updated, and set the Payload Type property to Player Stats.
Add a variable in that graph called LatestData and set its type to Player Stats. When we receive a message, we will store the data we receive in that variable. Add a node to set the value of the variable.
The graph should now look like this:
Displaying
To display values received from the gameplay message router we need to bind a function in the UI. To do this select the UI element which will be updated (i.e. in this case the SpeedValue text box) and click the binding button:

Clicking this button and selecting "Create Binding" will create a function. Add the nodes shown here:
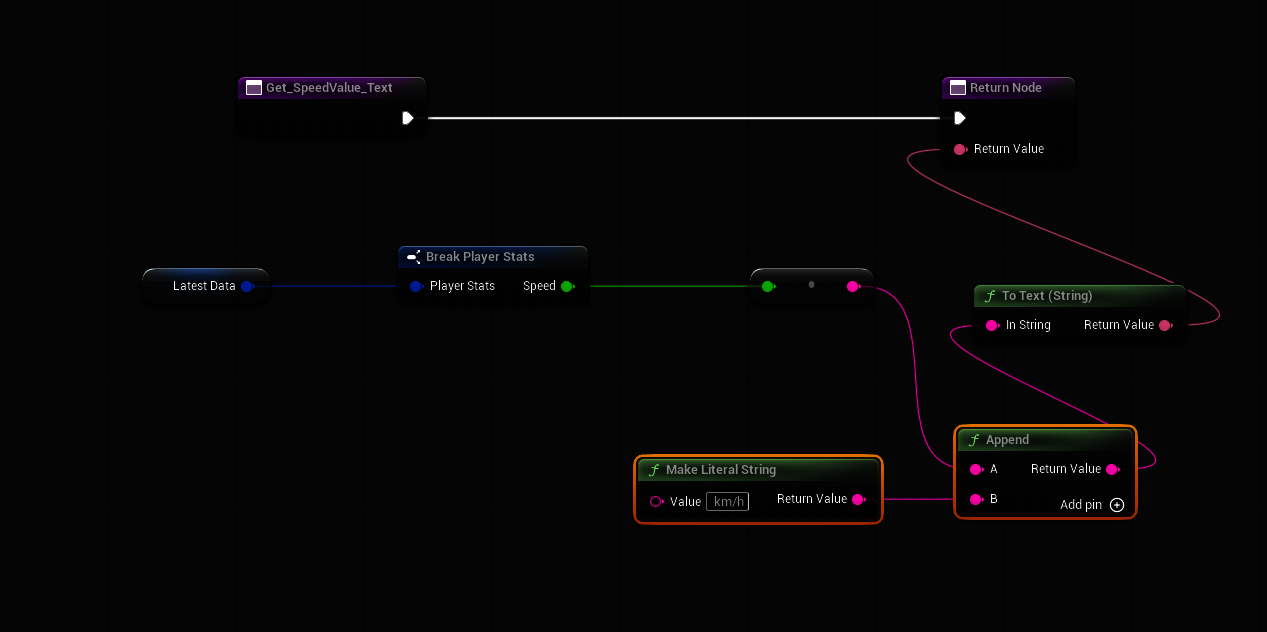
These nodes:
- extract the Speed property from the FPlayerStats structure held in the LatestData variable
- append it to a string with the "km/h" suffix
- return it to be displayed in the UI.
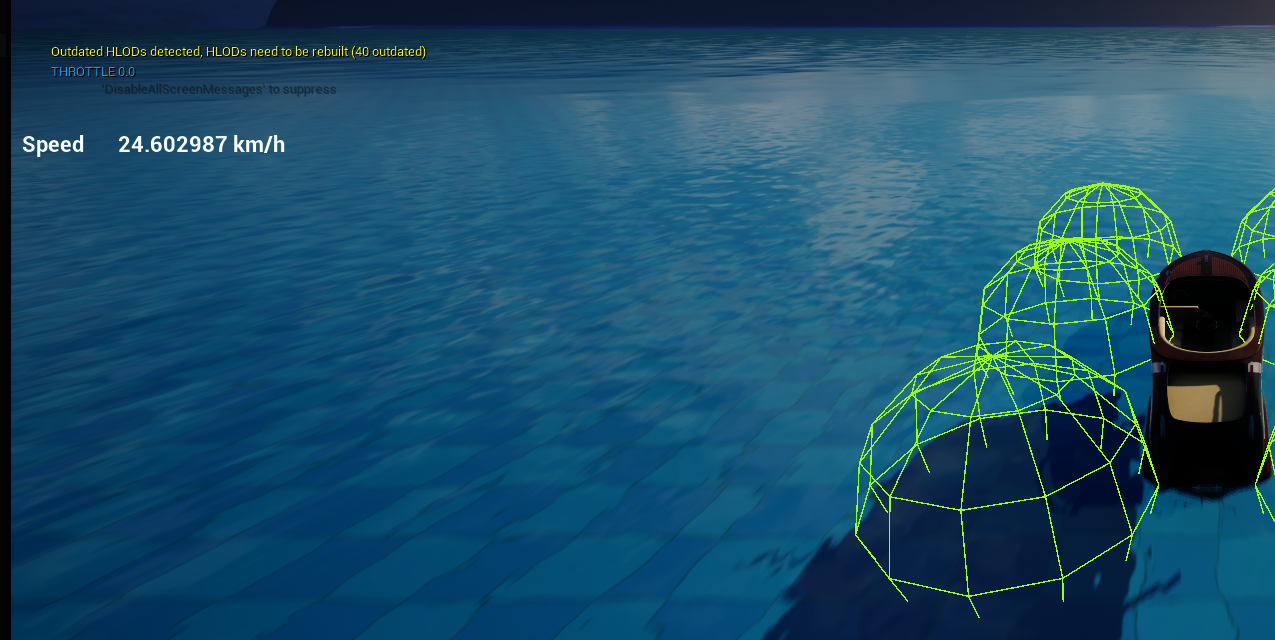
Results
With our blueprint HUD set in the World Settings game mode, the HUD is displayed like this: