Using Sequencer to make GIF Files from Unreal Engine
This describes one approach to making GIF files from Unreal Engine. This approach is used to make the GIF files on this site.
Tools
This approach uses Sequencer and ffmpeg. Both Sequencer and ffmpeg have many, many functions and options, here we use the bare minimum required to create a GIF.
ffmpeg can be downloaded from https://ffmpeg.org/download.html
Recording from Unreal Engine
Adding a Master Sequence
We will be using a master sequence, which is an object which controls a collection of shots. For the purposes of this exercise we will have only one shot.
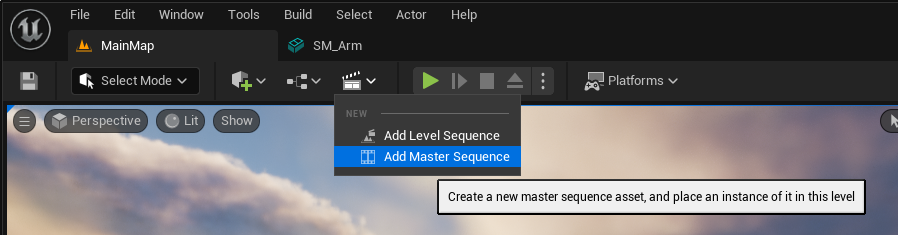
Assuming you are in the Unreal editor, click on the Cinematics button and select "Add Master Sequence" like this:
This dialog appears:
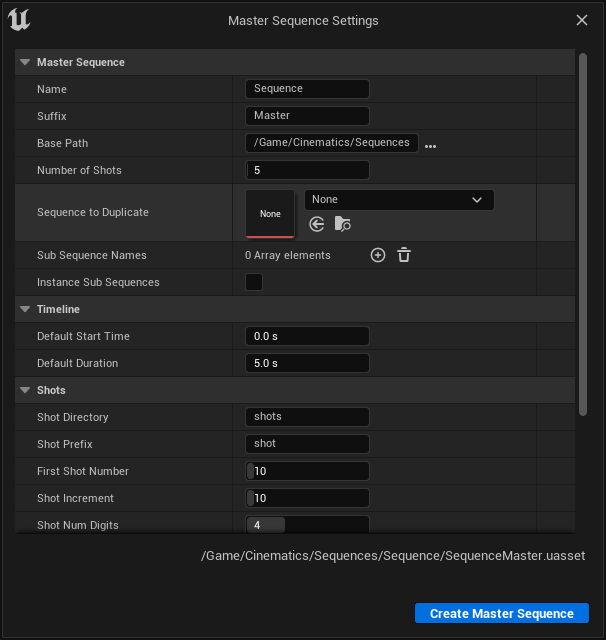
Change the Number of Shots to 1 and click the "Create Master Sequence" button.
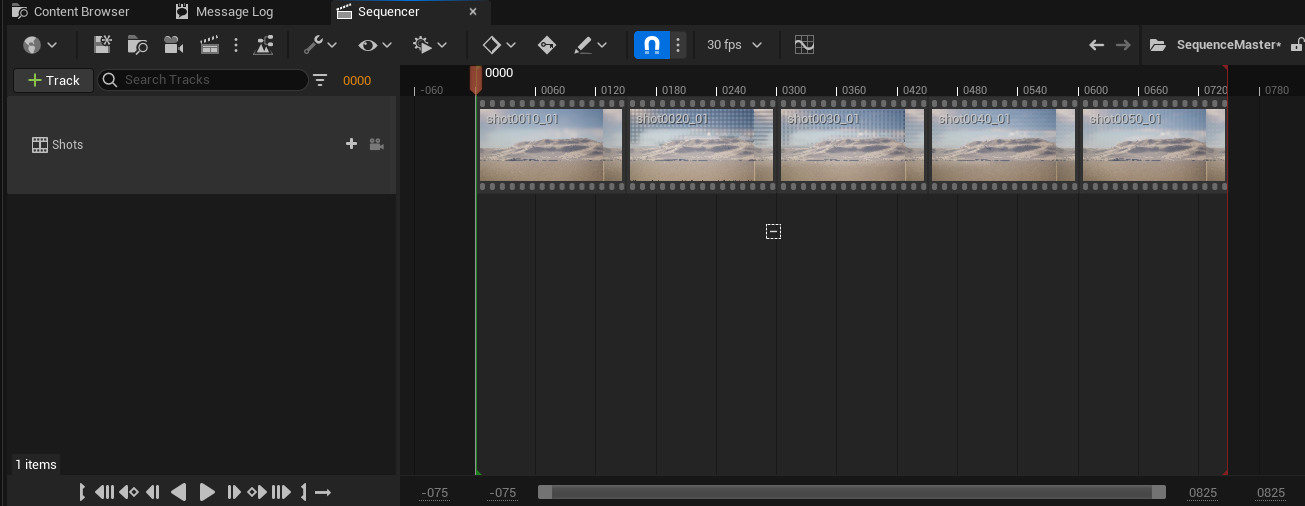
Adding the master sequence opens the Sequencer tab like so:
and adds a CineCameraActor object to the scene, visible in the Outliner window:
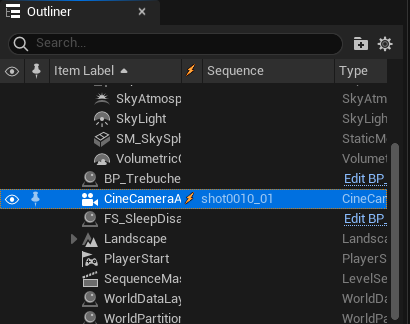
The lightning bolt next to the actor in the outliner window indicates the camera is spawnable and so only exists in the scene when sequencer is rendering.
Aiming the Camera
One way of positioning the camera is to right click it in the outliner and select "Pilot CineCameraActor" and then change the view to point the camera at scene you want rendered in the GIF:
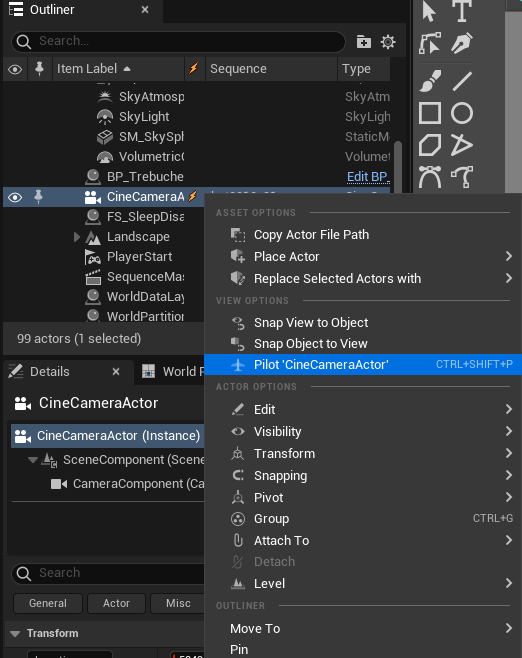
Once the camera is pointed where you want right click the camera again and select "Stop Piloting CineCameraActor".
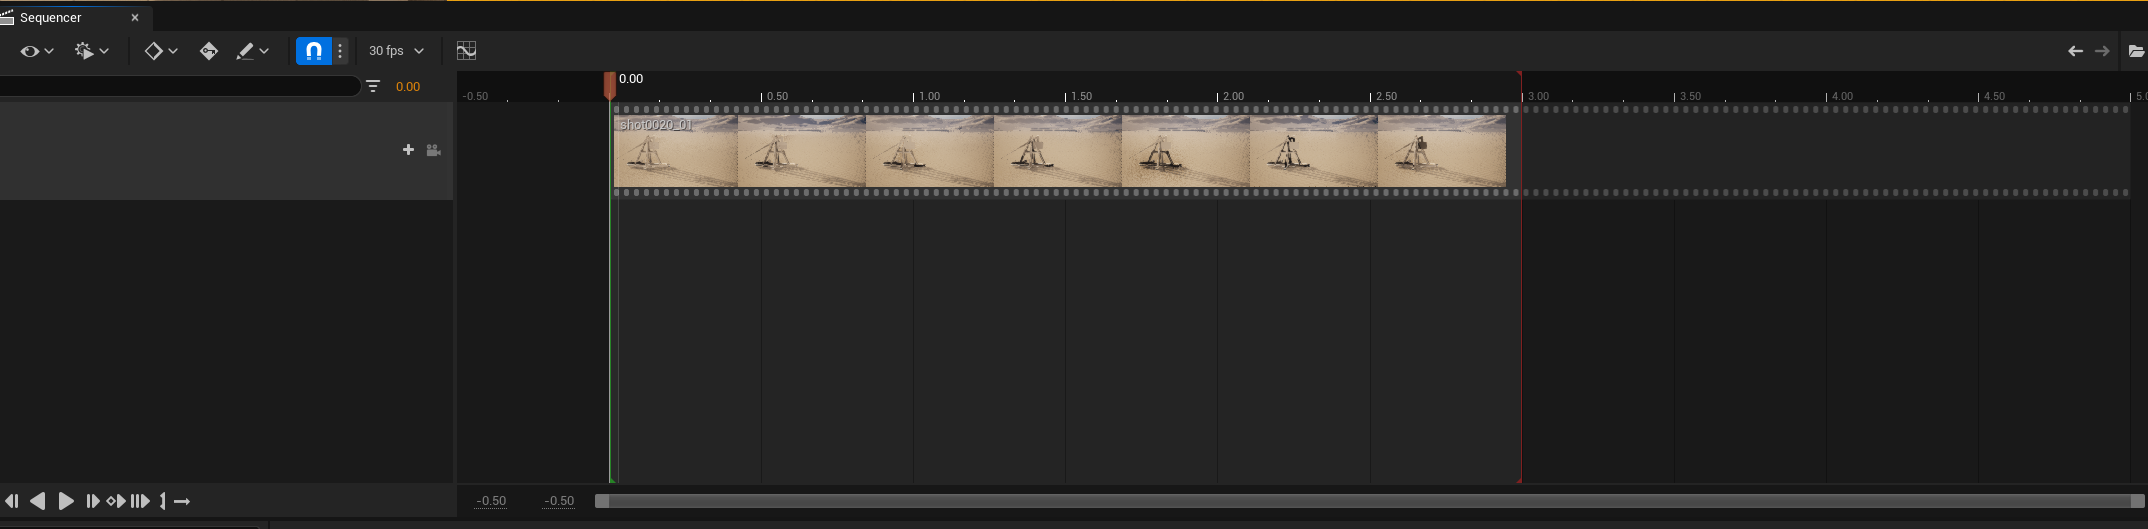
Setting the GIF Duration
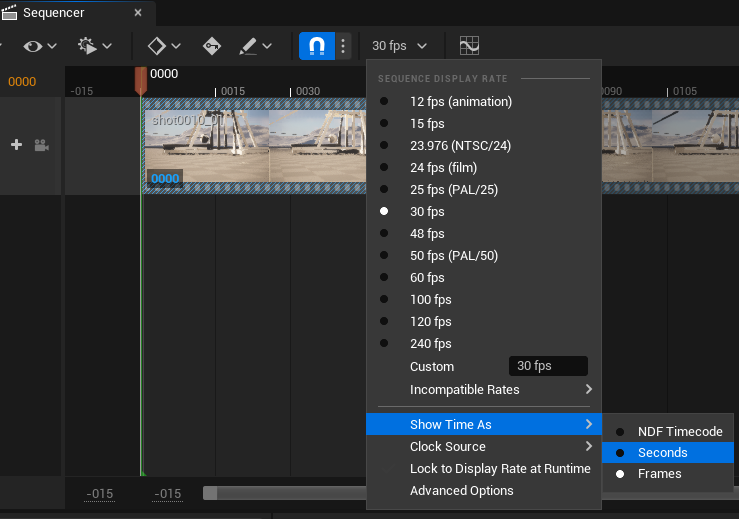
If it helps you can change the timeline from frame to seconds by clicking on the "30 fps" button:
We need to do two things to change the length of the shot
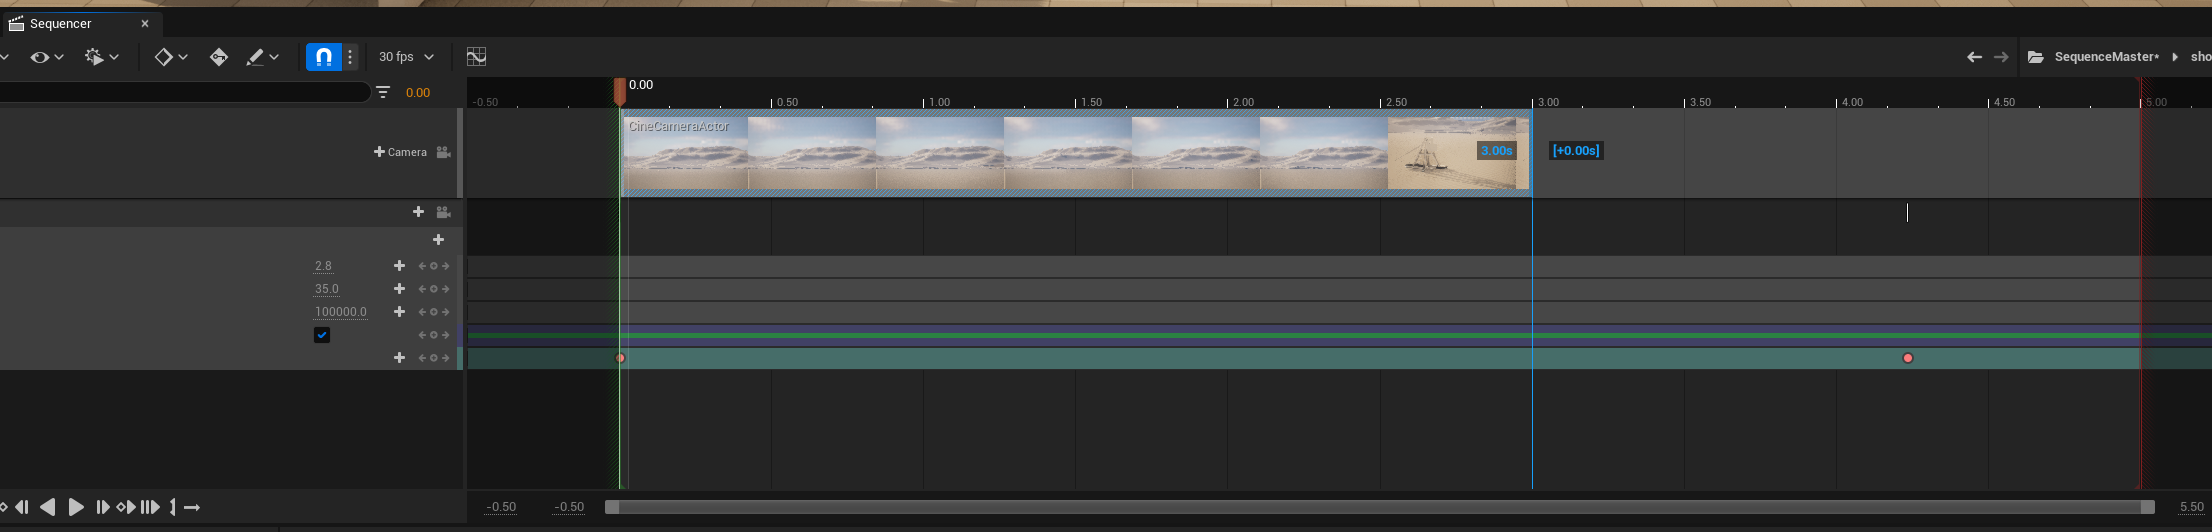
(1) In the sequencer window click the red line and drag it to the left to shorten the length of the camera cut:
(2) Click the SequenceMaster button shown here:
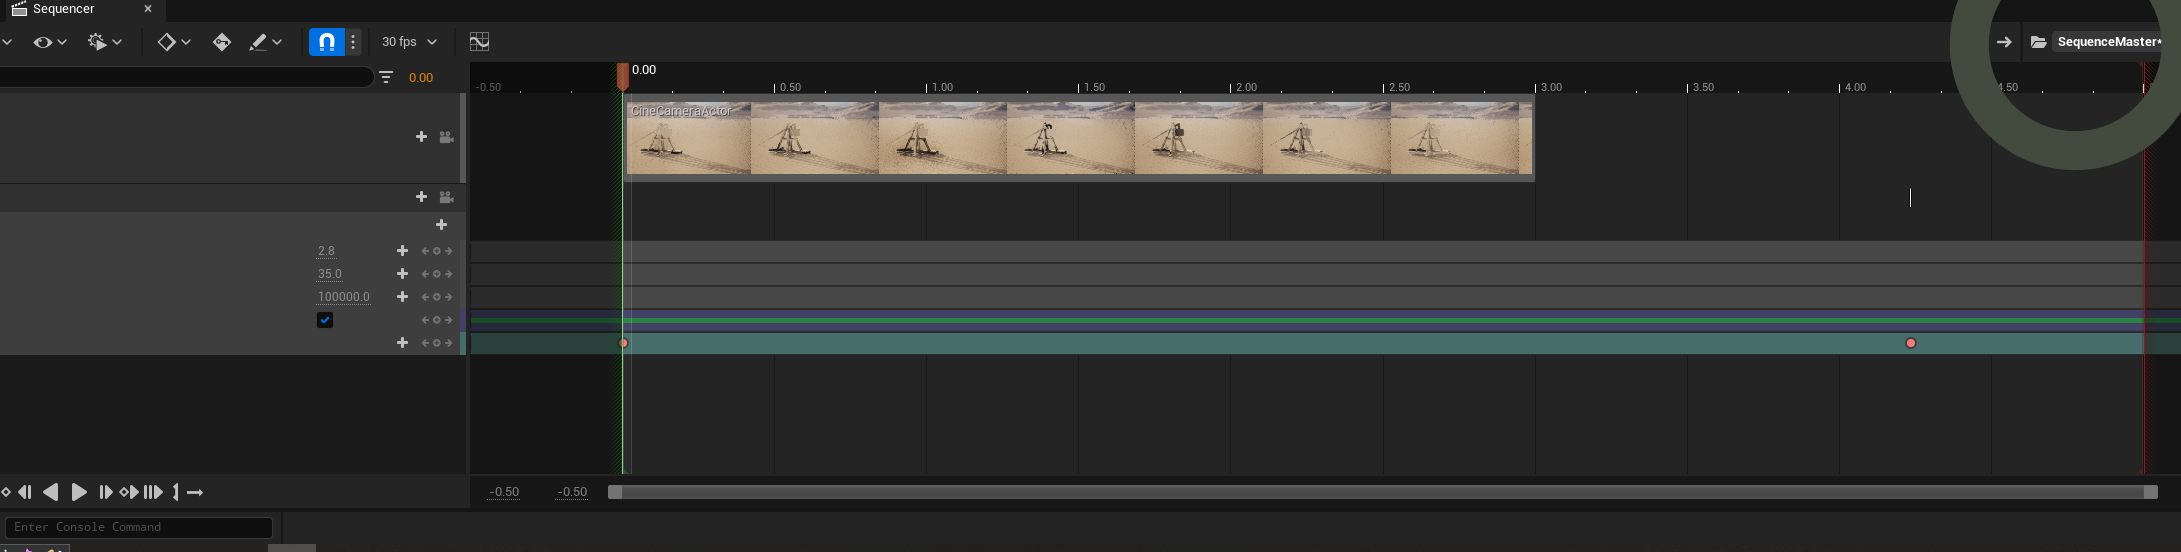
and drag the rightmost red line to change the length of the shot:
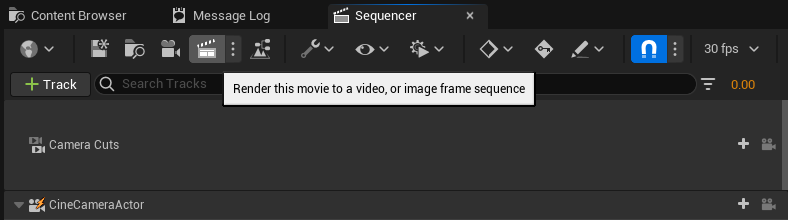
Rendering to PNG files
We want to render each frame to a separate PNG file which will serve as the input to ffmpeg.
Click the render button shown here:
Change the render settings to the ones shown here:
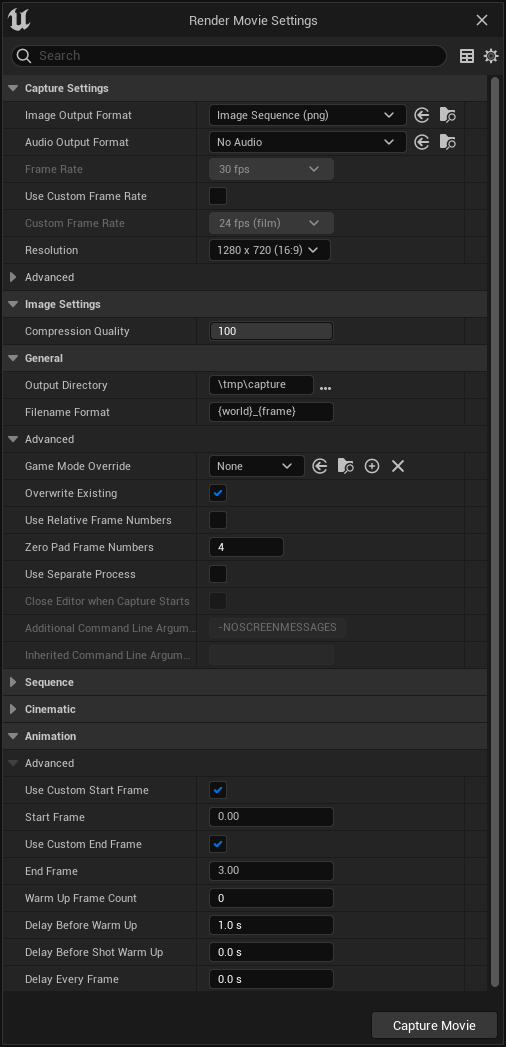
Particularly we changed these values from their defaults:
- Image Output Format to Image Sequence
- Resolution to 1280 x 720
- Filename Format to {world}_{frame}, changing the default "." to "_"
- Overwrite Existing (In Advanced) to checked, otherwise each time you capture frames the file names will change
- Delay Before Warm Up to 1.0s, otherwise the first frame can be blurred
Press the Capture Movie button. Once capture is complete a notification popup appears and you can press "Open Capture Folder" to open the directory where the PNG files were generated.
Creating the GIF using ffmpeg
Assuming you have ffmpeg installed and on the path, there are two commands to run to create a GIF from the set of image files created by Unreal.
The example Unreal level used here was called "MainMap" - this provides the basis for the file names created by the Capture Movie process - you will need to substitute your own map name in these commands.
These steps are:
- open a command window
- change to the directory containing the image files
- run this command to create a palette from the colours used in the first PNG file.
ffmpeg -i MainMap_0001.png -vf palettegen palette.png -y - run this command to create the GIF file
ffmpeg -framerate 24 -i Mainmap_%4d.png -i palette.png -y -filter_complex "paletteuse[v];[v]scale=720:-1" output.gif
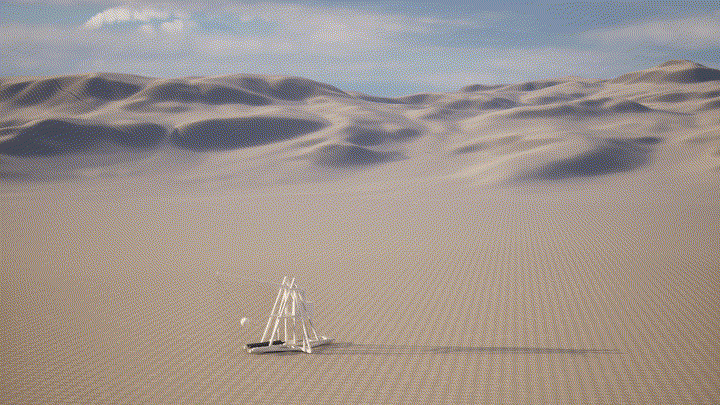
The scale value changes the quality of the GIF, higher values mean better quality but a larger GIF file. The framerate specified should match the framerate used in the Render Movie Settings dialog. The GIF below was recorded at 24fps and created by ffmpeg at 12fps so it appears to be in slow motion.
For example with "scale=720" the GIF below is 18.1 Mb:
Whereas with "scale=360" it is only GIF below was reduced to 4.5 Mb:

If you place these commands into a .bat file, you will need to change the "%" character to "%%" like so:
ffmpeg -framerate 24 -i Mainmap_%4d.png -i palette.png -y -filter_complex "paletteuse[v];[v]scale=720:-1" output.gif
becomes
ffmpeg -framerate 24 -i Mainmap_%%4d.png -i palette.png -y -filter_complex "paletteuse[v];[v]scale=720:-1" output.gif
References
- Sequencer Tutorial https://www.youtube.com/watch?v=5jHhIah8H7U
- Sequencer Bad First Frame https://forums.unrealengine.com
Feedback
Please leave any feedback about this article here